Monday, February 14, 2011

Desk Bell/Call Bell


This bell is one that many people have seen during their lives, they aren't seen as frequently today as they once were. These classic bells used to found nearly everywhere, from teacher's desks, to secretary counters in Dr.'s offices, Post Office counters, the front desk in hotels, on the counter at the tailor's, etc.  This list goes on.  These bells make neat gifts for people who are in the fields that used to use these bells.  Teachers sometimes get a kick out of them, and even put them to use in their classrooms after receiving one.

Where do you remember seeing the desk bell?

Monday, February 7, 2011

Bells for Pets

Some people have used bells that hang off of their doorknob to train dogs how to let them know when they want outside to use the bathroom. But how many of you have heard of a cat who has learned how to ring a bell to notify their owners of some sort of need?

Janet at 
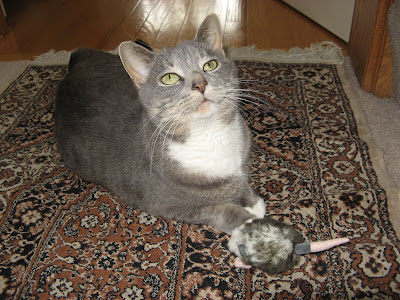
Of Cats and Cardstock has taught her cat, Lily, how to ring a bell for food. Lily learned how to ring her bell for food and even got to the point that Janet had to confiscate the bell. However, Lily, being a very intellectual feline, found that one of her toys has a bell in it and decided to use that as the replacement for her bag of bells. 

Picture of Lily by Janet

Now that is a smart cat!

Teaching pets an alternative way to let us know things can come in handy, no more dog scratches in the door, and no more loud and crazy mewing from the cat who just wants an early dinner.

For the doggie "door bell" you could get some ribbon (probably 1" wide or wider) sew jingle bells or craft size cow bells every so often down the length of your ribbon (leaving a big enough empty spot at the top to tie around your doorknob.) And make the ribbon long enough for "Fido" to reach with his/her paw.

For the Kitty "dinner bell" get some scrap fabric (cotton or some other organic type that will not harm your cat if she chews on it) cut out 2 squares or rectangles (choose a size that you feel would be appropriate for your kitty. and sew together 3 sides with the side that you want to show, facing each other. Then flip the fabric right side out. Place a few jingle bells inside (you can also stuff it if you want the bells to sound more muffled) then stitch together the open end.

Hope your pet bell ringing training goes well!

And thank you Janet for allowing us to feature Lily in our blog!

Update:

From Janet: I actually got the idea to teach Lily because I knew of a dog who had been trained to use a doggie door bell as you describe. I'm sure Lily could have been trained with a hanging bag, just like a dog, but I used a cloth bag which sits on the floor next to her food bowl.

It took about 2 weeks of training for her to consistently ring the bells for food. At first I wiggled the bag with her paw so she'd hear the bells then gave her a nibble of her food. I kept doing this until she associated the sound with the food. I also repeated the command "ring the bell" until she learned to do it herself. I would love to hear any success stories! :)

From a Facebook friend:  our rabbit uses one, its rather silly, and adorable at the same time.

Wednesday, February 2, 2011

Bells for your Scarecrow

On Pressure Cooker Outlet's blog we talked about the benefits of having an edible garden. Now, what if you go ahead with your garden only to discover that the birds are feasting upon your hard worked for vegetables & fruits? One method that has been used since America was first settled is the Scarecrow.

Making a scarecrow does not have to be a difficult task.

Materials:
2x4 board 6 to 7 feet long
2x4 board 3 to 4 feet long
Hammer
Nails
Rope
Hay or something to stuff with
Old unused clothing (great way to recycle some items)
Ribbons
Something to make noise (BELLS!)
(needle and thread may be needed depending on the bells you decide to use)
Old pillow case

Directions:
  1. Place the longer 2x4 on the ground, nail the shorter one to it in a lowercase t shape, so that it is low enough to be considered arms.
  2. When you dress your scarecrow if using pants, put the long piece of lumber through one leg, stuff both legs with straw or other stuffing and tie the waistband to the board.
  3. Place the scarecrow in its garden spot and pound the frame into the ground.
  4. Finish dressing the scarecrow by putting on its shirt and stuffing the arms.
  5. Fill the pillowcase with straw for the head and slip it over the top of the board; tuck the pillowcase end into the shirt and use rope to secure the head to the frame.
  6. Add finishing touches, like a face, hat, gloves etc.
  7. Place ribbons streamers, bells, pie plates or chimes so they’ll move when the wind blows, if desired.
We recommend sewing mini cow bells to the ends of about half of your ribbons before tying them onto the scarecrow.  This will add much needed racket and it will ensure that the bells are well placed so that they do not fall off. Jingle Bells will work as well.


Now you are ready to go!
Related Posts Plugin for WordPress, Blogger...